
If you want to start shooting video then you should know the importance of the exposure triangle: ISO, aperture, and shutter speed. This trio of interacting settings shows the essence of every photograph that was captured by you. Depending on what you are shooting, the style of your films and your camera, your settings will change and vary. In this article we will discuss how to adjust settings on film cameras.
We will discuss the mysteries of the exposure triangle. We will discuss the interplay of ISO (film speed), aperture and shutter speed, to enhance your film photography skills. Mastering these fundamentals will elevate your craft to new heights. For video shooting there are many different settings that are not the same as photography.
How To Adjust Settings On Film Cameras : Main Camera Setting
There are three main camera settings to consider when taking a photo: ISO, aperture and shutter speed. In this article we will discuss how we can adjust these settings.
ISO/ASA
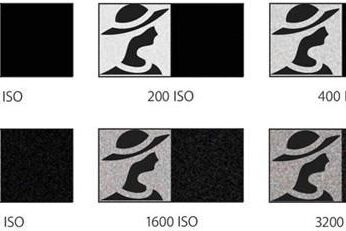
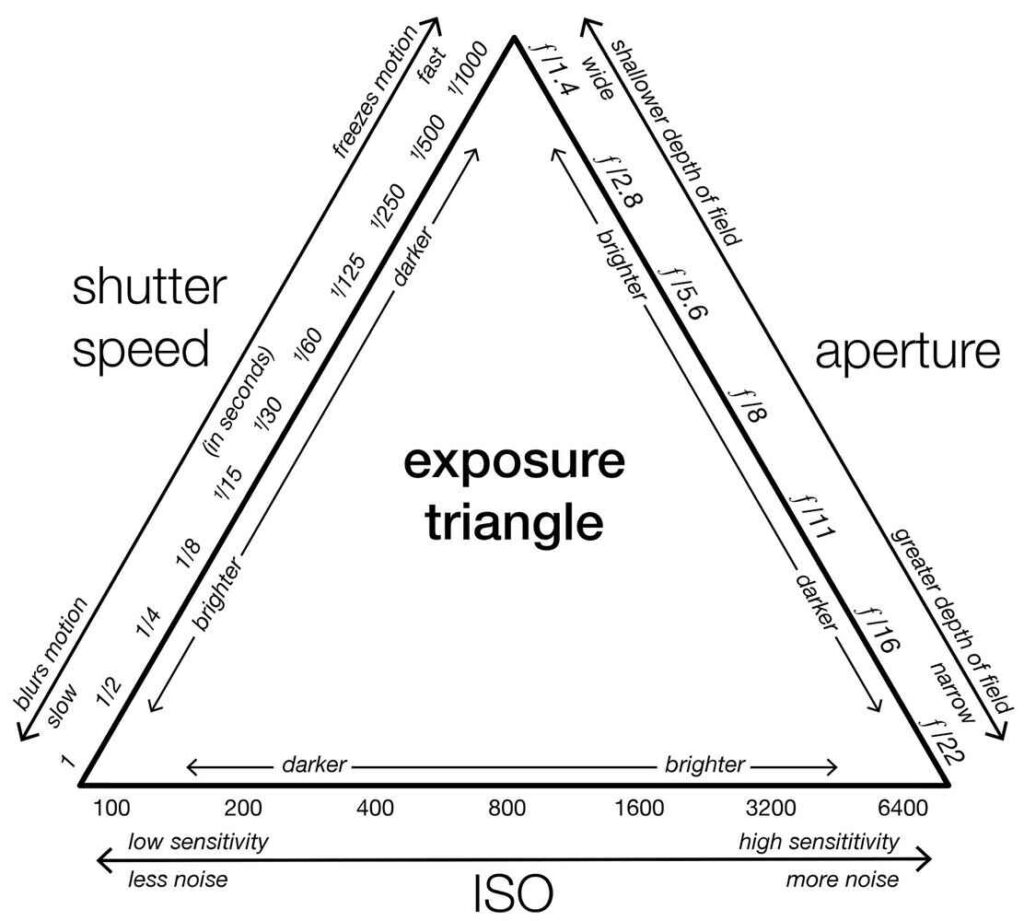
The ISO of a film tells us about the sensitivity of light. It also determines how grainy the images will be.
- ISO 100 = less light sensitive, less grainy, good for bright sunny days outside
- ISO 400 = more light sensitive, slight grain, good for overcast days outside and indoor scenes
- ISO 800 = very light sensitive, grainy, good for night time
Setting your ISO on a film camera is easy because you want to set it to the same speed as the film you are putting in your camera. There is usually a number associated with each type of film labeled on the box. This is the ISO you want to set on your camera.
Here are some examples:
- Ilford HP5 400 = ISO set to 400
- Kodak Portra 800 = ISO set to 800
- Fuji CN200 = ISO set to 200
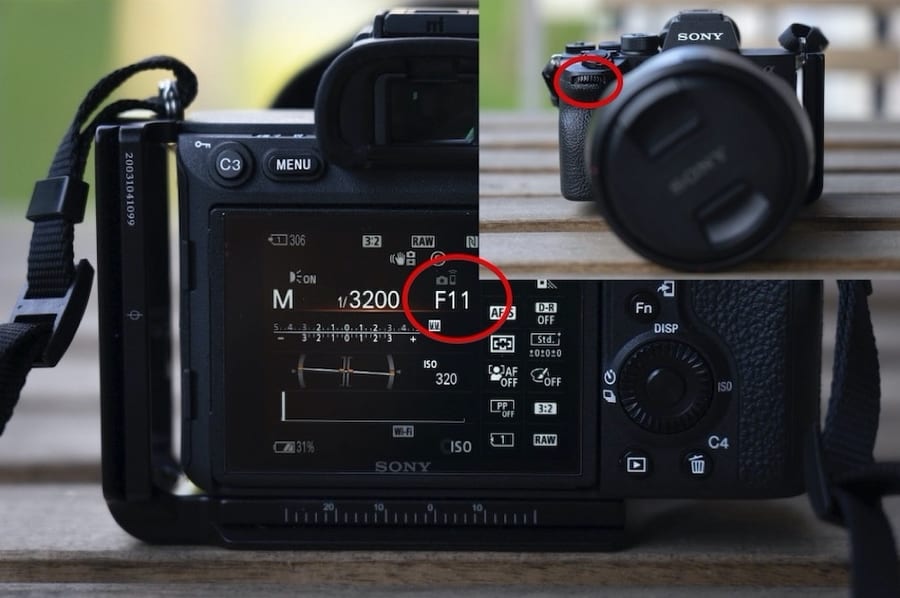
The ISO dial on your camera is typically on the top of your camera to the left hand side below the rewind knob. It will be the dial with numbers ranging from 50 to 3200 and is typically marked ASA.
Aperture
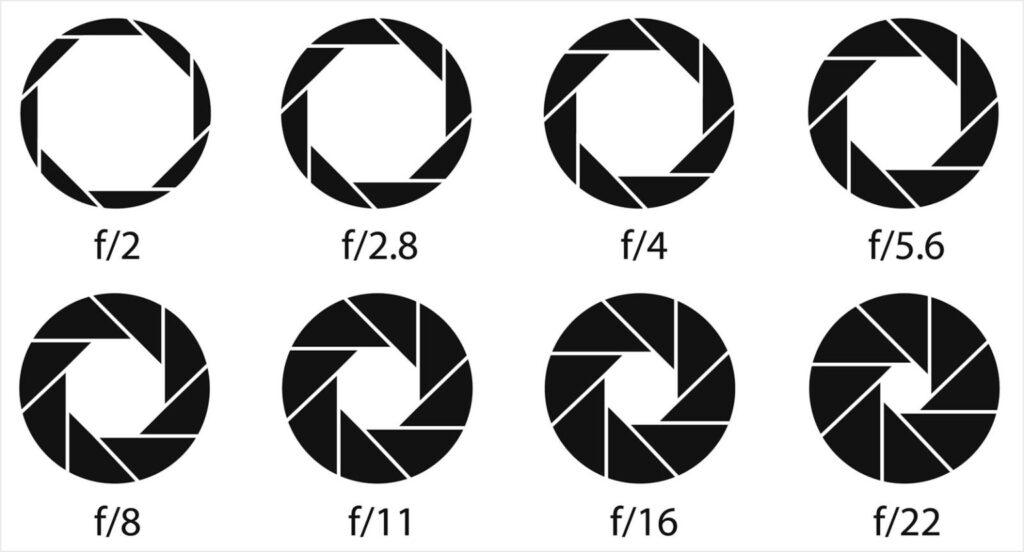
A camera’s aperture determines an image’s depth of field. It allows you to make the background either in focus or blurry to highlight a subject. Aperture is measured by F-Stops ranging from 1.4 – 22.
Low Apertures
When the aperture is set to a lower number (f1.4 – f8). The shallower depth of field means the closest subject to the lens. As a result of this we will get a sharp image but the background will be blurry. When the aperture is set this low the lens dilates allowing more light to come into the camera.
High Apertures
When the aperture is set to a bigger number (f11 – f32). The deeper depth of field means all subjects will be in focus even in the background. When the aperture is set this high the lens contracts allowing less light to come into the camera.
The aperture dial will be located on your lens. This is a setting that is typically not on the camera body. The dial will be at the base of the lens closest to the camera. Dial has numbers ranging from 1.4-32. Depending on the camera you may be able to see the aperture.
Shutter Speed
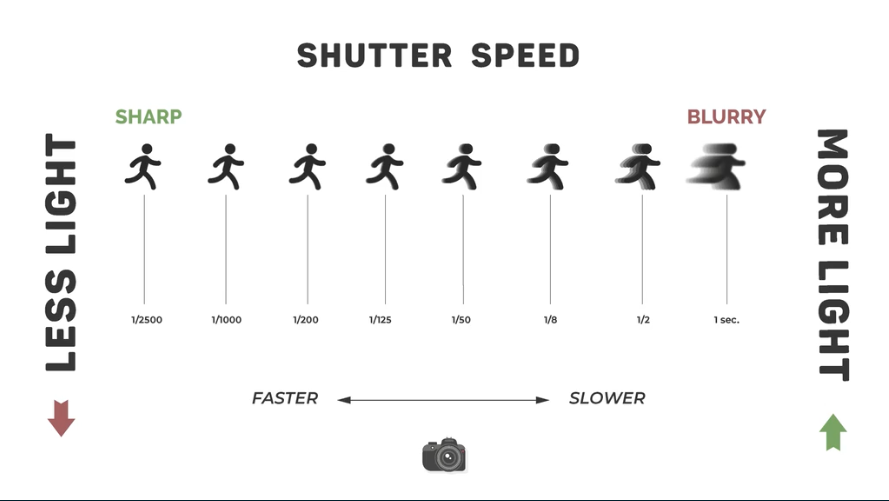
A camera’s shutter speed determines how sharp or blurry your image will be. It is measured in seconds and can range from 1/1000 of a second to 5 whole seconds. Typically the numbers in the diagram represent the most common speeds you will see on your camera with maybe some faster and slower speeds.
Shutter speed dials on cameras usually do not list the speed in fraction form. If you set your shutter speed to a bigger number such as 250 it is actually a very small fraction of a second.
Read More: Web Apps Can’t Access Android Phone Cameras: Reasons And Solutions Of Restriction
Fast Shutter Speed
When the shutter speed is set to a bigger number (1/1000 – 1/60). Any movement will be stopped and in focus. The shutter will open and close much faster, preventing a lot of light coming into the camera.
Slow Shutter Speed
When the shutter speed is set to a smaller number (1/30 – ½). Any movement will be visible and make the image appear blurry. The shutter will be open for a longer amount of time allowing more light into the camera.
The shutter speed dial is typically located on the top of your camera on the right hand side. It will have numbers ranging from 1-1000.
Exposure Triangle
Each setting, ISO, aperture and shutter speed, is necessary to understand when wanting to shoot an evenly exposed image. When you set one of these settings it has an effect on the other settings. Because each setting changes how much light is coming into the camera.
If you want to set your camera to a faster shutter speed since you want it to be as sharp as possible. This means that not much light will be coming into the camera. Depending on the light conditions, you have to set your aperture to a smaller number to make the lens dilate and balance the lack of light due to the fast shutter speed.
Read More: Color Space Shifting : Why Is My Camera Raw In Display P3?
Useful settings : How To Adjust Settings On Film Cameras?
Full settings assuming 400 speed film is in the camera:
- Outdoors, general shooting. 1/250 f11 in full sun. 1/125 with clouds. I’m over exposing and keeping a small aperture to help when zone focusing.
- Outdoors, lights at night. 1s f8. This works for scenes like fountains or downtown buildings with the lights on. To get more depth of field, reciprocity starts to kick in so that the calculated 4s, f22 must be converted to about 10s f22.
- Indoors, bulb lights. 1/60 f2. Slight under exposure to prevent motion blur. 1/30 is preferable if you have steady hands and a steady subject. f2.8 is pushing it.
Partial Settings For Specific Scenarios:
Indoors with flash. Sync speed and f8. The fastest shutter speed is compatible with flash. It means your lighting is completely in control. Exposure is a function of flash power and a light meter or digital camera. It must be used to determine the settings. f8 is in the sweet spot for image quality.
Star trails – avoid them by keeping exposure time to under 10s. Star trails that look like they were taken on purpose start at 15 minute exposures. 60 minutes and beyond creates impressive trails. f5.6 is a good starting point, but not that essential.
Light trails. Shutter speeds of 10s to multiple minutes.
Water movement. 1/500 or faster to freeze it. 1/125 is mushy. 1/30 looks blurry. 1/4 is smooth. Exposures in the minutes make water look like fog.
Aircraft with propellers. 1/25 to 1/125 to get a desirable blur. Freezing the propellers makes the plane look like a stationary model. For jets, any speed is fine.
Moving vehicles. 1/125 and below for panning shots.
General Tips
- Black and white film is very forgiving. When it comes to exposure – especially if you are scanning the film and processing on a computer. Definitely better to over expose than under expose.
- Know what the full stop numbers are for aperture and shutter speed. The reciprocal rule helps convert a rule of thumb into a purposefully creative settings combination. Apertures values: 1.4, 2, 2.8, 4, 5.6, 8, 11, 16, 22, 32… Shutter speeds: 1/1000, 1/500, 1/250, 1/125, 1/60, 1/30, 1/15…
- Keep things in full stop to keep it simple. Half stops are over-kill. You only need to consider half stops when you have a quirky lens like an f1.8 or f3.5. 1/3rd stops are for delicate studio lighting setups.
- For normal focal lengths, the shutter speed at or above 1/60 to prevent blur from camera movement and it freezes most things bar fast cars and small children.
- Purposefully blowing out the highlights or making silhouettes can be achieved by altering shutter speed and aperture. It can easily be done in post production. It is easier to remove detail from a well exposed image than to add it back into an over or under exposed one.
Sunny 16 rule
This is great for street and travel shooting. In full sun, use f16, set the shutter speed to 1/ISO. In HP5 (400 ISO) most of the time I could use 1/500, but often round down to 1/250 because over exposure is preferable to under exposure.
A little cloud and I’m down to 1/125. Heavy clouds or shadowy areas get 1/60. I don’t like to go slower than 1/60, so I open the aperture as dusk sets in.
Equivalent Settings
Any part of the exposure triangle can be changed. If the total exposure is to stay the same, the other parts of the triangle must be modified to compensate. For example, if we are using sunny 16 in full sun with 400 speed film, we would use 1/250, f16.
If we want a shallower depth of field, we can open the aperture and compensate by making the shutter go faster – 1/500 f11 and 1/1000 f8. When the maximum shutter speed is reached, an ND filter can be used to block more light so an even wider aperture can be used.
With film, the equivalency rules break down with longer shutter speeds as the chemicals do not react to light linearly with time. This is known as reciprocity failure. It is fine from fast speeds down to about one second, but beyond that extra time needs to be added to compensate.
For example, with Ilford’s HP5 film, the technical information sheet uses a graph to convert a calculated shutter speed into a practical one. For example, 5s becomes 10s, 10s becomes 30s, 20s becomes 75s, 30s becomes 3 minutes.
Frequently Asked Questions
1: What Are The Most Famous Camera Settings For Film?
A: The common rule for shutter speed is to set it at double your frame rate. So for a film shot at 30 fps, you will set a shutter speed of 1/60. A film shot at 24 fps, shutter speed of 1/50.
2:What Is The Rule Of 16 In Film?
A:The rule states on a sunny day, set your aperture to f/16 and your shutter speed to the reciprocal of your ISO setting. For instance, if you’re using a film with an ISO of 100, your settings would be f/16 at 1/100th of a second.
3:What IS0 Is Best For A Film Camera?
A:ISO is the film sensitivity. It’s a number, more common ISOs are 100 and 400. The higher the ISO, the higher the film sensitivity and the larger the film-grain size. If you plan to shoot indoors in low light conditions, film ISOs of 400, 800, or even 1600 are preferred.
Conclusion
We have discussed in this article, the exposure triangle of ISO, aperture, and shutter speed is the cornerstone of film photography. It’s a delicate balance that every photographer must learn to navigate, blending technical knowledge with creative expression. You can also invest in a light meter in the beginning. In this article we have discussed how to adjust settings on film cameras? ISO has an impact on film speed and grain, mastering aperture’s role in depth of field and light regulation, and utilising shutter speed to control exposure time and motion blur, are all vital skills in a film photographer’s armament.
The interplay of these elements allows for an incredible range of artistic possibilities, enabling photographers to bring their unique vision to life.Analogue photography is as much about experimentation as it is about precision. You should explore different settings, various combinations, and see what works best for your style. Each adjustment in the exposure triangle is an opportunity to tell a different story through your lens.

